Lab 1-9 Parent and Child Disks

Create two more servers

  1. One of the really cool things you can do with Virtual Servers is create one perfectly set up server, and then lock it and use that hard drive to make “copies” of that server.
  2. Why would you do this?
    1. You have to test different software on different servers, but you don’t want to mess up your original.
    2. You want to have all servers to have the same configuration so you don’t have to go through the reinstallation each time.
    3. The “Father” disk can act as a backup in case one virtual server becomes corrupt.
  3. Be sure your first AD Server 1 is completely updated and patched before moving on.
  4. Once you are SURE it’s completely updated shut down.
  5. Locate the AD Server1.vhd file on your computer.
  6. Right click, select properties.
  7. Click read only.
  8. Once you have created a “daddy disk” you do not want to make ANY changes to it, or it messes up your differencing disks.
  9. Notice that your drive is only taking up 6.64GB of space, even though it’s a 50GB virtual disk. Isn’t that cool?


read only.jpg

  1. Make sure your AD Virtual Server 1 is completely in the off state.
  2. If things are slow, turn off your workstation as well.
  3. ONCE YOU START THIS PROCEDURE YOU MUST NEVER DELETE OR MODIFY YOUR ORIGINAL VIRTUAL HARD DRIVE! NEVER EVER. EVER.
  4. Once you start this, what must you never do?


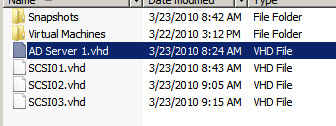
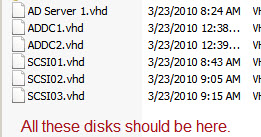
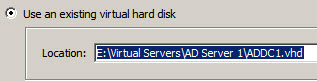
14.  Open Hyper-V manager and select your host server name.

15.  Under the Action menuàNewàHard disk.

16.  The virtual disk wizard will come up.

17.  You are going to select a Differencing Disk. Read the description, what is a Differencing Disk for?


18.  Name the disk ADDC-1.vhd. Make sure it saves where the rest of your virtual disks are.

19.  On the next screen you have to tell it where your parent disk is. That’s you AD Server 1.vhd disk. Click Browse and then Open.

20.  Click Next. It will show you your setup. Make sure everything is correct. Click finish.

21.  Repeat this step one more time, but name the second drive ADDC2.vhd. Once again, you want to use the AD Server 1.vhd. Check your folder to make sure you have a total, at this point, of six disks. One parent (AD Server 1.vhd), 2 children (ADDC1 and ADDC2), and your three SCSI drives.

differencing.jpg


vhd.jpg

disks.jpg

  1. Now you’re going to create a new virtual machine that uses those disks. You’re actually going to create two.
  2. Go to Hyper-V manager and ActionàNewàVirtual Machine
  3. Name this yourname_ADDC1.
  4. Make sure it’s storing it in the right place.
  5. Give it 1000MB Ram.
  6. Connect it to External Net.
  7. Click Use and existing virtual hard disk and browse for ADDC1.vhd.
  8. Click Next.
  9. Select “Start Virtual Machine after you’re done”.
  10. What happened?


For your IP address:

Group One: IPs 192.168.1.201-215

Group Two: IPS 192.168.1.216-230

Group Three: IPs 192.168.1.231-254

Group Four: IPs

Default gateway: 192.168.1.1

Subnet mask: 255.255.255.0

DNS: 192.168.1.70 and 192.168.1.71

X=the number of your workstation in the classroom.

child machine.jpg


vhd1.jpg