Lab 1-2 Installing Windows XP
We are going to use Virtual PC 2007 to run multiple operating systems over either Vista or Windows XP. We’ll begin by installing Windows XP as your Host System.
Objectives:
- Install a Windows Operating System
- Install drivers
- Run Windows Update
|
Step |
Shot |
|
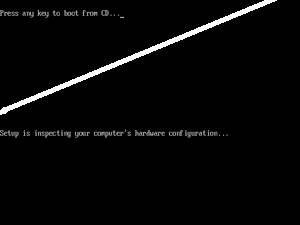
a. Get a computer out of the closet and label it with your name (see me for a label). b. Get your Windows XP disk and a list of product keys. c. Plug everything in, set everything up. d. Put the CD into the drive and boot from CD. e. During the first part of the setup you’re going to be staring at a pretty blue screen for awhile. This takes place in a version of MS DOS. f. We don’t need to install any RAID drivers or anything, so just watch and contemplate the meaning of life. |
|
|
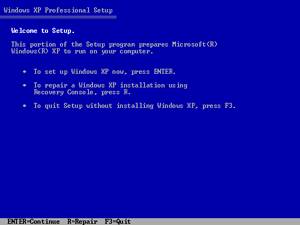
g. Welcome to setup will ask you what you want to do next. There is probably already an operating system on this computer, but we are going to KILL it (muahahahahahaha). h. Press enter to setup Windows XP. i. Think more about the meaning of life, the universe, and everything. (See 42) j. Next comes the EULA (End User License Agreement). Commit this to memory. It is VERY important. Read every single syllable on the screen…twice. k. Hit F8 (that would be the button with the F and the 8 on it…yes, people have asked). |
|
|
l. At this point if there was already an XP on it, it will say “Hey, I found this version of XP. Do you want me to repair it?” m. No, you don’t. You want to nuke the little bugger….so say no. n. You will then get to a screen that looks similar to this, but it might have more partitions. You are going to delete all those partitions. o. Select a partition, press D. Read the screen and follow the instructions until you have deleted all the partitions. p. When you have no partitions, you’re going to create two partitions. Make C: all but 5000 MB (5 GB) of your space. Make D: the rest of the space. q. Format the partition NTFS (quick). r. Examine your belly button for lint. |
|
|
s. As the partition formats, it’s going to take a long time (especially if it’s a big hard drive). t. You’ll see a yellow bar as it copies files to your hard drive. u. Windows XP is a relatively easy installer. You don’t have to interact with it very much. So just let it do its thing. |
|
|
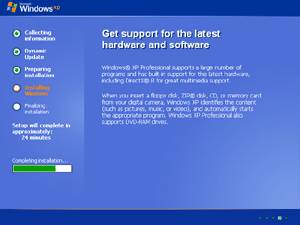
v. The computer will reboot. Just let it be…don’t pop the CD out or anything. w. It is now in the GUI phase of installation. You’ll see all sorts of propaganda about how marvelous XP is. Read it and commit it to memory, just like the EULA. x.
While
you are waiting, work on other labs! |
|
|
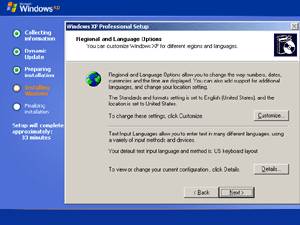
y. Suddenly your computer will want to talk to you. Since we’re doing an interactive installation, you’re going to have to interact. (You can do unattended installs using an answer file.) z. First set your language (English, please). aa. Next type YOUR full name and organization: 1. Your Name: type your name (duh) 2. Organization: Your group name |
|
|
bb. Enter the product key. Check and double check what you type. If it doesn’t work the first time, try it again…don’t come complain to me. cc. Give your computer an appropriate SIMPLE name. (If you network this computer, you will understand why SIMPLE is important.) dd. For password, use password. You may enter another account with your own username and password, but in case we need to get into your computer in the other class it MUST have the password password. ee. Obviously in real life you would NEVER use password as your password…unless you are not too bright. |
|
|
ff. Make
sure date and time is right (it probably is…if not, time zone is |
|
|
gg. Next it will go to network setup. You do not have your network card drivers installed, so do not set up network options at this time. hh. Select typical settings. ii. Keep it on workgroup jj. Let it finish doing its thing! Sing a little song (to yourself) and make animal shapes out of your belly button lint. |
|
|
kk. Next you’re going to get the splash screen (yay) and it might tell you it needs to set your video to make it look prettier. Go ahead and do that. ll. Next do the initial setup. Here is where you can create a special account just for you. mm. Leave off how it will connect to the Internet. |
|
|
NEXT: nn. If Service Pack 2 is not installed, install it. oo. You are going to need to find drivers for your network card. Microsoft actually has a driver cache so your driver may be installed already. Test it by moving your network cable from your workstation (the Dell) to your network jack and see if it lights up. pp. If it does light up, you should be in business and can run Windows Update. If it doesn’t, you’re going to need the drivers for your card. qq. If you need the drivers: Look at the CDs on the wall and see if your network card driver is there. If you don’t know…well that’s what second year students are for! Get help from them! |
You must install
SP2 if you are planning on doing the rest of the labs…which you are, so don’t
skip this step. Virtual PC will not install without it. |
|
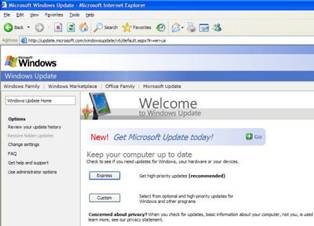
Run Windows Update 5. Open Internet Explorer and go into Internet Options. 6. Click the connection tab. 7. Click on LAN connection. 8. In the proxy area (towards the bottom) type in the proxy: 169.204.171.8 port 81. 9. Now run Windows Update. 10. Run Windows Update over and over until you’re completely patched. This is very important!!! |
|


Great! Now you have your VERY OWN Windows XP!