|
Company
Name |
|
|||||||
|
Employee
Names |
|
|||||||
|
Team Lead |
|
|||||||
|
Module
Name |
How Computers Work |
|||||||
|
Certification
Test |
|
Vendor |
|
|||||
|
Objectives
covered |
|
|||||||
|
Time
allotted |
10 Days |
Time
Taken |
|
|||||
|
Date
Started |
|
Date
Completed |
|
|||||
|
Portfolio
Contents |
Complete |
Incomplete |
Points
Awarded |
|
||||
|
Lab
reports for all labs (List labs) |
|
|
|
|
||||
|
Lab 1-1 |
|
|
|
|
||||
|
Lab 1-2 |
|
|
|
|
||||
|
Lab 1-3 |
|
|
|
|
||||
|
Lab 1-4 |
|
|
|
|
||||
|
Lab 1-5 |
|
|
|
|
||||
|
Lab 1-6 |
|
|
|
|
||||
|
Lab 1-7 |
|
|
|
|
||||
|
Lab 1-8 |
|
|
|
|
||||
|
Lab 1-9 |
|
|
|
|
||||
|
Completed all lab reports (one
per lab) |
|
|
|
|
||||
|
Hardware/Lab
Test Score for Each Member (attach sheet) |
Score |
|
|
|
||||
|
|
|
|
|
|
||||
|
|
|
|
|
|
||||
|
|
|
|
|
|
||||
|
|
|
|
|
|
||||
|
|
|
|
|
|
||||
|
Lecture
Notes (one per student) |
|
|
|
|
||||
|
Completed solution to problem portfolio |
|
|||||||
|
Customer Overview |
|
|
|
|
||||
|
Identify Customer Needs (both current and future) |
|
|
|
|
||||
|
Jargon
defined |
|
|
|
|
||||
|
Identify Possible Solutions |
|
|
|
|
||||
|
Define terminology used (jargon, technical terms) |
|
|
|
|
||||
|
Price Out Solutions |
|
|
|
|
||||
|
Diagram of Solutions |
|
|
|
|
||||
Notes--How
Computers Work
A Plus
Mrs.
Klementsen, MCP A+
What is a
Computer?
•A computer is a collection
of ____________________ components which are controlled by software.
•Hardware—____________________components
•Software—Set
of ____________________that direct the hardware to perform a task.*
How
Hardware and Software Work Together
•Hardware is used by
software to:
–____________________Data
–____________________
–____________________
•____________________
•____________________controls
the hardware
•Software talks to hardware
using ____________________code.*
Major
Hardware Components
•____________________ ____________________Unit
•____________________
/____________________ Devices
•____________________ (mother) Board
•____________________ (floppy, hard, CD, DVD, BluRay)
•____________________ Supply
•____________________ Cards (circuit boards)
•____________________
The CPU
•The CPU
(________________________________________) is the brains of the computer.
•It is the central and most
important device.
•All (____________________)
data/commands travel through the CPU
•Without a CPU, a computer
could not ____________________*
•Stores
____________________in storage devices
•Performs
____________________
•Processes
____________________
•____________________results
CPU
Operations
•Every device in the
computer requires three things to operate
–A method for the CPU to
____________________with the device
–____________________to
control the device (____________________)
–____________________to
power the device.
•Some use the computer’s
power
•Others have their own power
cords*
How This
Works
•You double click a program
icon
•The program
(________________________________________) is transferred from the hard disk to
RAM
•The CPU loads the program
from ____________________
•The data is
____________________
•Depending on the program
this keeps happening over and over again while you’re using it.*
Review
•Name the parts of a
computer system
•What is
the brains of the computer?
•What happens when you
double click on an icon?
•What is hardware?
•What is software?
•How does software USE
hardware?*
Input/Output Hardware
•Input
•____________________
•____________________
•____________________
•____________________
•____________________
•____________________
•____________________
•Output
–____________________
–____________________
–____________________
Keyboard
•Primary ____________________device
•Connects using
–____________________
(Deutsche Industrinorm)
–____________________
–____________________
–____________________
•Uses power from computer
case*
Mouse
•Pointing Device
•Has one, two, or three
buttons
•Mouse connectors
–6-pin mini DIN (most
common)
–____________________port
–____________________port
–____________________
–____________________
–Magic*
Monitor
•CRT (cathode ray tube)
–Monitors are rated
according to the size of screen (in inches) by the number of dots used on the
screen. A dot is also known as a pixel.
–Connect with a
_________-pin 3 row video connector
Monitor
•LCD
–____________________crystal
displays
–Use two sheets of
____________________material with liquid crystal between them
–Electric
____________________passes through them
–Each crystal either lets
light ____________________, or doesn’t
•____________________matrix—cheap
and icky
•____________________ (thin
film transistor)—as sharp as a CRT, expensive(er)
•OLED
–Organic
________________________________________Diode
•No backlight required
•Very cool
•Very ____________________
•Draw way less
____________________
•Has a short life
(____________________hours)
•Flexible and really cool*
Printer
•Primary output device
•Types
–____________________jet
–____________________matrix
–____________________
–Dye ____________________
•Connects with
–____________-pin parallel
connector
–____________________
–____________________
–____________________
–Wireless*
Review too
•What is the most commonly
used input device?
•What is the most commonly
used output device?
•What are three ways an
input device can connect to a computer?
•What are the four types of
printers?
Hardware Inside Computer
•____________________board
•____________________
(maybe), hard drive, CD/DVD ROM
•____________________Supply
•____________________Boards
(expansion cards)
•____________________*
Computer
Guts
Circuit
Boards
•Circuit boards are used by
the CPU to ____________________with things inside and ____________________the
case.
•Two kinds of circuit boards
–____________________
____________________ (TTL)
–____________________________________________________________
(CMOS)*
TTL vs CMOS
•TTL
–Require more
____________________than CMOS
–Produce more
____________________
–Faster than
____________________
–Are more resistant to
____________________
•CMOS
–Slower
–Hold data
____________________
–Require
____________________power (which is why a battery can power the CMOS chip)
–Most CPUs are
____________________*
System
Board
•Aka Mainboard,
motherboard
•Contains
–____________________
–________________________________________
–____________________
–____________________and
CMOS Battery
–____________________chip
–____________________
–____________________slots*
System
Board Components
•____________________—the
tiny fine lines you see on the motherboard. Enable data and power to travel
along the board.
•____________________—Pathway
of communication that includes the method and the protocol used to communicate.
•Binary _________s and
__________s travel down the lines of a bus.*
•System
____________________—A crystal that times activities of chips. Makes sure
things happen at the right time.
•____________________slots—Holds
expansion cards such as modems, video cards, etc.
CPU
•____________________—chip
inside of computer that executes most commands
•Often works with a
____________________set
–____________________that do
the low-level processing to free up CPU for ____________________level
•Some older machines also
have a ____________________ (or slot for one) to speed up certain math
functions.*
CPU
Temporary
(Primary) Storage
•Storage that is
____________________.
•Faster than
____________________storage (hard drives, floppies)
•Includes
•____________________
•____________________
(older, single inline memory modules)
•____________________ (dual
inline memory modules
•____________________ (rambus inline memory modules)
–____________________memory
–____________________ (cache
on a stick)*
Permanent
(secondary) Storage
•____________________
(non-volatile) storage
•____________________drive
•____________________drive
–3.5 inch standard (1.44 MB,
ED 2.88 MB)
–Played with Superdrives for awhile
–5.25 inch old (110, 360,
and 1200 KB)
•____________________drive
(100-250MB)
•____________________drives
(aka jump drives) (64MB-1GB)
•CDR/CDRW
•____________________
•____________________ (solid
_________________ drives)
•Other kinds of
____________________ cards*
Types of
Expansion Slots
•____________________—Peripheral
Computer Interface
•____________________Express
•____________________—Accelerated
•____________________—Industry
standard architecture
•____________________—Extended
ISA
•____________________—Video
Electronics Standard Association*
Power
Supply
•____________________system—Power
supply connects to the mother board. Components use the power from the PS.*
Data
Stored on System Board
•Important software is
stored permanently on the motherboard
–____________________Chips
–Setting physical
____________________switches
•____________________tells
the computer how to start up before the OS starts.
•One type of ROM is the
____________________chip. Has programming necessary to start the computer.*
Updating
Firmware
•Flashing the BIOS
•Can only flash FLASH ROM
–____________________
(Electronically Erasable Read Only Memory)
–____________________
(Erasable Read Only Memory)
•Must use ONLY a flash
program for your particular BIOS version or ____________________things happen.
CMOS
•Is a CMOS
____________________or non-volatile?
•____________________—it
requires a battery to keep the data in the chip.
•Holds
____________________setup information.
•Other information is stored
by physically setting jumpers or DIP switches on the board.*
Software
•Three types of software
–____________________ (BIOS)
–____________________System
–Applications
•Now we could also add
____________________—virtual pc software that you can use to emulate other operating
systems on.*
BIOS
•Basic Input Output System
•Starts up the computer and
controls some of the ____________________
•By controlling some HW it
frees up the ____________________to control other stuff.
Operating
System
•The program(s) required to
control the hardware in the system using device drivers
•Acts as an interface
between appli____________________cations and the
system.
•Manage ____________________
•Mange files on
____________________storage
•Manage
____________________memory (RAM)
•____________________problems
w/hardware and software*
Operating
System Cont.
•Perform housekeeping type
procedures
–____________________disks
–Deleting
____________________
–Changing
____________________date
•Interfaces
–____________________driven
–GUI
Different
Operating Systems
•____________________
•____________________
•____________________
•____________________
•____________________
•____________________
•____________________
•____________________
Applications
•Applications allow the user
to use the computer in a ____________________way.
•Applications
____________________with the OS, which interacts with the BIOS
•The BIOS and OS interact by
sharing data via the CPU.
•The OS stores the data in
RAM.
Applications, cont.
•Each piece of
____________________is assigned a ____________________address.
•The CPU pulls this
information out of ____________________, using the address, as it is needed. It
can then process the commands given by the software/OS.*
Data in
Memory
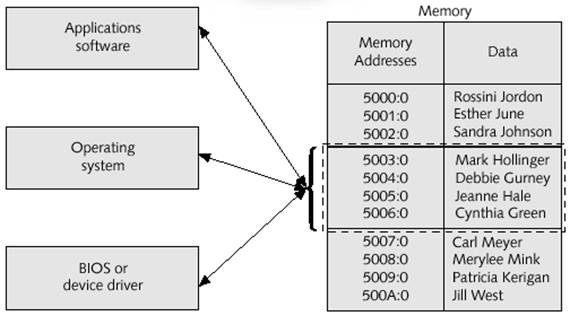
Applications Cont.
•____________________run on
top of the OS.
•For an application to run,
it must first be loaded into memory and assigned memory addresses.
•Applications are often
____________________specific, but not necessarily version specific.*
Review
•This is the physical
component of a computer.
•This is a collection of
commands/instructions.
•The primary language of
computers
•Two states of binary
•1=
•0=
Review Two
•The ___ is the most common
input device.
•The ____ is the most common
output device.
•Virtual memory refers to
the process of using the hard drive as though it were RAM.
•A CMOS chip is faster than
a TTL chip?
•A TTL chip requires more
power than CMOS.
Review
Three
•All data and commands
travel through the CPU.
•What are the four major
operations of the CPU?
•What uses a 6-pin mini DIN
connector?
•Transistor-transistor logic
is a kind of…
•This is also known as the mainboard.
•Hard drives are considered:
Review
Four
•ROM is considered:
•This expansion slot is used
for video.
•The most important hardware
device in a computer is the ____.
Lab 1-1 Building a New Computer and Inventorying Parts
ACTIVITY
You are
going to build a new computer from parts in the classroom. As you build it, you
are going to inventory each part by brand.
DIRECTIONS
- Get out your tools.
- One toolkit
- One grounding strap
- Collect your parts
- Case
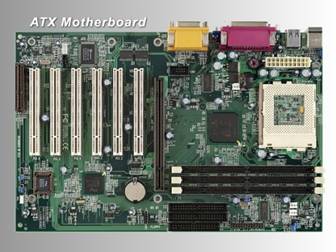
- Motherboard
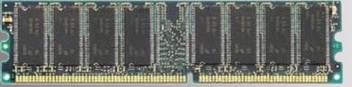
- RAM
- Processor/heatsink
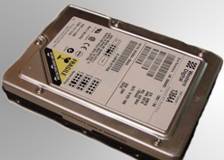
- Hard drive
- DVD burner
- Make sure your area is
clean.
Rules:
·
Hold all parts by the
edges. Do not touch the leads.
·
Place parts on anti-static
bags when not in the case
·
Motherboard MUST be secured
using all the holes in the tray that align with the board.
·
Do NOT turn on the computer
without me or a second year present.
·
At the end of EVERY day the
case side MUST be screwed back on. No exceptions.
·
NEVER leave your computer
or parts out.
·
Do NOT throw any of the
boxes or software away. We keep all anti-static bags.
·
These computers are not
yours. You may not write on them, draw on them, deface them in any way or you
will pay for the entire computer upon removal from the class.
- Put on your grounding
strap.
- Connect one end of your
grounding strap to an unpainted surface on your computer. Connect the
other end to you (your wrist). Any time you open your computer, you
must be grounded.
- Locate the screws on
the back of your case. You will unscrew the screws that are farthest
from the power cord. Remove those screws and set aside. Do not lose them,
please.
- Remove your cover and
set it out of your way above you or below, but NOT on the floor.
- Open the motherboard
box. Take the board out, lay it on the antistatic
bag with nothing else underneath.
- Place the processor in
carefully. There should be a “sticker” on the bottom of the heatsink/fan. Remove it.
- Secure the fan to the
processor. Make sure it’s on there completely.
Connect it to the motherboard (look at the manual,
it HAS to be in the right spot.)
- Insert the RAM
properly. Since it is dual channel, be sure they are in the correct
channels to take advantage of that. (Read the manual.)
- Put the hard drive
into the proper bay and secure on both sides with four screws. (NO
SHORTCUTS!) Before you screw it in, make sure the cable reaches the
motherboard.
- Secure the DVD drive
into the top bay.
- Attach the cables to
the back of the drives and to the motherboard.
- Attach the USB
headers. This is challenging on
some motherboards, but it is NOT optional. No whining. Just do it.
- Attach the HDD light,
reset switch, power switch, power light, etc. to the proper headers.
- Connect the power to
the motherboard.
- Connect the case fans
to the motherboard or to the power supply.
- Connect the power
cable to the wall.
- Connect the KVM switch
to the monitor and keyboard mouse, then to the back of the computer.
- Do not put the side
on. Call someone over (me or a second year). Plug in the power. Push the
power button.
If the fan does not spin, turn it off
immediately. Check the fan and make sure it’s on tight and the cable is in the
right spot.
22. Wait for the beep. If you
hear one beep, you’re golden! Yay! You just built a
computer!
|
After
you are done you will label your computer and will lock them away after each
class period. |
||
|
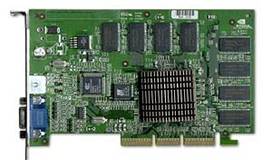
Video
Card
|
Brand |
|
|
|
|
|
|
Model |
|
|
|
|
|
|
|
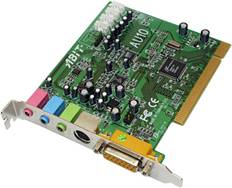
Sound
Card
|
Brand |
|
|
|
|
|
|
Model |
|
|
|
|
|
|
|
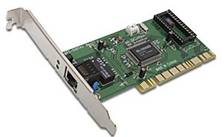
Network
Card
|
Brand |
|
|
|
|
|
|
Model |
|
|
|
|
|
|
|
CD ROM
|
Brand |
|
|
|
|
|
|
Model |
|
|
|
|
|
|
|
Hard
Drive
|
Brand |
|
|
|
|
|
|
Model |
|
|
|
|
|
|

|
Motherboard
|
Brand |
|
|
|
||
|
Model |
||
|
|
||
|
Processor
|
|
Brand |
|
|
||
|
Model |
||
|
|
||
|
Memory
(RAM)
|
Brand |
|
|
|
||
|
Model |
||
|
|
||
|
Other
(draw picture) |
Brand |
|
|
|
||
|
Model |
||
|
|
||
|
Other
(draw picture) |
Model |
|
|
|
||
|
Brand |
||
|
|
||


Once you
have completed this lab, return the equipment you borrowed, keep this
information, and go onto lab 1-2.
Lab 1-2 Installing Windows XP
We are going to use Virtual PC 2007 to run multiple operating systems over either Vista or Windows XP. We’ll begin by installing Windows XP as your Host System.
Objectives:
- Install a Windows Operating System
- Install drivers
- Run Windows Update
|
Step |
Shot |
|
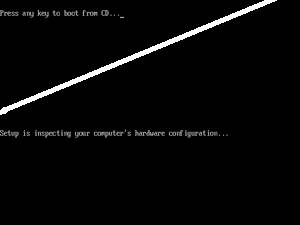
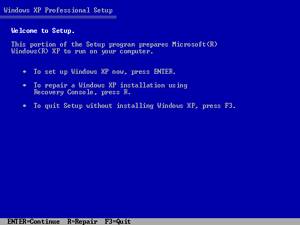
a. Get a computer out of the closet and label it with your name (see me for a label). b. Get your Windows XP disk and a list of product keys. c. Plug everything in, set everything up. d. Put the CD into the drive and boot from CD. e. During the first part of the setup you’re going to be staring at a pretty blue screen for awhile. This takes place in a version of MS DOS. f. We don’t need to install any RAID drivers or anything, so just watch and contemplate the meaning of life. |
|
|
g. Welcome to setup will ask you what you want to do next. There is probably already an operating system on this computer, but we are going to KILL it (muahahahahahaha). h. Press enter to setup Windows XP. i. Think more about the meaning of life, the universe, and everything. (See 42) j. Next comes the EULA (End User License Agreement). Commit this to memory. It is VERY important. Read every single syllable on the screen…twice. k. Hit F8 (that would be the button with the F and the 8 on it…yes, people have asked). |
|
|
l. At this point if there was already an XP on it, it will say “Hey, I found this version of XP. Do you want me to repair it?” m. No, you don’t. You want to nuke the little bugger….so say no. n. You will then get to a screen that looks similar to this, but it might have more partitions. You are going to delete all those partitions. o. Select a partition, press D. Read the screen and follow the instructions until you have deleted all the partitions. p. When you have no partitions, you’re going to create two partitions. Make C: all but 5000 MB (5 GB) of your space. Make D: the rest of the space. q. Format the partition NTFS (quick). r. Examine your belly button for lint. |
|
|
s. As the partition formats, it’s going to take a long time (especially if it’s a big hard drive). t. You’ll see a yellow bar as it copies files to your hard drive. u. Windows XP is a relatively easy installer. You don’t have to interact with it very much. So just let it do its thing. |
|
|
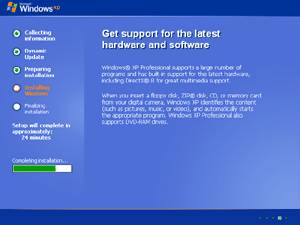
v. The computer will reboot. Just let it be…don’t pop the CD out or anything. w. It is now in the GUI phase of installation. You’ll see all sorts of propaganda about how marvelous XP is. Read it and commit it to memory, just like the EULA. x.
While
you are waiting, work on other labs! |
|
|
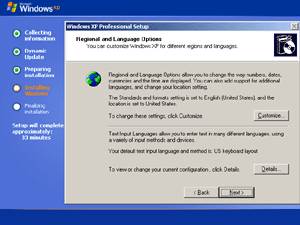
y. Suddenly your computer will want to talk to you. Since we’re doing an interactive installation, you’re going to have to interact. (You can do unattended installs using an answer file.) z. First set your language (English, please). aa. Next type YOUR full name and organization: 1. Your Name: type your name (duh) 2. Organization: Your group name |
|
|
bb. Enter the product key. Check and double check what you type. If it doesn’t work the first time, try it again…don’t come complain to me. cc. Give your computer an appropriate SIMPLE name. (If you network this computer, you will understand why SIMPLE is important.) dd. For password, use password. You may enter another account with your own username and password, but in case we need to get into your computer in the other class it MUST have the password password. ee. Obviously in real life you would NEVER use password as your password…unless you are not too bright. |
|
|
ff.
Make sure date and time is right (it probably
is…if not, time zone is |
|
|
gg. Next it will go to network setup. You do not have your network card drivers installed, so do not set up network options at this time. hh. Select typical settings. ii. Keep it on workgroup jj. Let it finish doing its thing! Sing a little song (to yourself) and make animal shapes out of your belly button lint. |
|
|
kk. Next you’re going to get the splash screen (yay) and it might tell you it needs to set your video to make it look prettier. Go ahead and do that. ll. Next do the initial setup. Here is where you can create a special account just for you. mm. Leave off how it will connect to the Internet. |
|
|
NEXT: nn. If Service Pack 2 is not installed, install it. oo. You are going to need to find drivers for your network card. Microsoft actually has a driver cache so your driver may be installed already. Test it by moving your network cable from your workstation (the Dell) to your network jack and see if it lights up. pp. If it does light up, you should be in business and can run Windows Update. If it doesn’t, you’re going to need the drivers for your card. qq. If you need the drivers: Look at the CDs on the wall and see if your network card driver is there. If you don’t know…well that’s what second year students are for! Get help from them! |
You must install
SP2 if you are planning on doing the rest of the labs…which you are, so don’t
skip this step. Virtual PC will not install without it. |
|
Run Windows Update 5. Open Internet Explorer and go into Internet Options. 6. Click the connection tab. 7. Click on LAN connection. 8. In the proxy area (towards the bottom) type in the proxy: 169.204.171.8 port 81. 9. Now run Windows Update. 10. Run Windows Update over and over until you’re completely patched. This is very important!!! |
|


Great! Now you have your VERY OWN Windows XP!
Lab 1-3 Installing Windows Virtual PC 2007
Objectives:
P Install Virtual PC on a Windows XP System
P Note: You may also use Virtual Box, which tends to run a little better. Instructions are very similar.
The purpose of Virtual PC is to allow businesses or individuals to run different operating systems together. The benefit of Virtual PC over a multi-boot system is that you can switch among the operating systems without having to reboot the machine! Very cool!
In order to install Virtual PC your computer must meet the following requirements. Make a note of how your computer relates to each requirement.
|
Requirement |
My computer in comparison |
|
400 Mhz Processor with L2 Cache
(1 GHz is recommended) |
|
|
CD ROM or |
|
|
Super VGA or higher video |
|
|
Keyboard and mouse |
|
|
You can install
on any of the following operating systems. The system you install on is
called the Host System.
|
|
The other operating systems you’re going to install are
called Guest Operating Systems. The
following table has the requirements for each of these systems:
|
Guest Operating System |
Minimum Memory |
Minimum Hard-Disk Space |
|
Windows 98 |
64 MB |
500 MB |
|
Windows ME |
96 MB |
2 GB |
|
Windows 2000 Professional |
96 MB |
2 GB |
|
Windows XP Home |
128 MB |
2 GB |
|
Windows XP Professional |
128 MB |
2 GB |
|
Windows |
512 MB |
15 GB |
|
Windows Vista |
512 MB |
15 GB |
|
Windows |
512 MB |
15 GB |
|
OS/2 |
64 MB |
500 MB |
These are minimums. If you were using the system for
production, you’d need a lot more. Add at least 1000 MB to each partition so
you can install programs!
|
Task |
Shot |
|
|
|
|
|
|

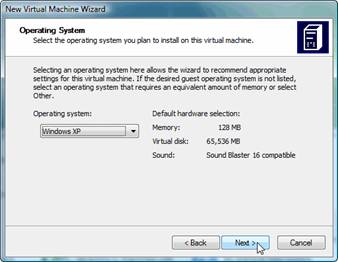
Lab 1-4 Installing Operating Systems into Your Virtual PC
Objectives:
P Install Virtual PC on a Windows XP System
P Install Virtual Machines
P Install Operating Systems.
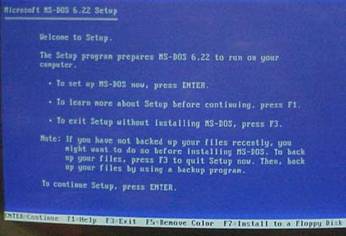
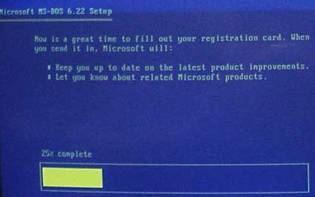
You’re going to start by installing DOS. Since DOS can be tricky, if it doesn’t work right away go into the next part and install Windows 98 and Windows Vista.
|
Task |
Shot |
|
|
|
|
|
|
|
Install Windows 98 in a Virtual Machine NOTE: THIS IS GOING TO TAKE ALL PERIOD,
SO DON’T START IT LATE IN THE DAY. WAIT UNTIL THE NEXT DAY IF YOU MUST! |
|
|
Host Key: You can’t use CTRL+ALT+ This key also releases your mouse by holding down the right ALT key, you can move your mouse outside your Virtual Machine. |
|
|
|
Install |
|
|
|


NOTE: This lab is
going to take a lot of troubleshooting and working together with others. This
is the first time we’ve used a Virtual Machine to set up our operating systems,
so be patient. It may take awhile. You don’t have to be perfect, just
persistent.
Questions:
- How long did it take you to complete this lab?
- What is the purpose of Virtual PC?
- What is a Virtual Machine?
- What is a Virtual Hard Drive?
- What three operating systems did you install? (Well…four)
- You’re using Virtual PC in Windows 98 and you need to check something on the Internet in your host operating system, but the mouse won’t go there! What do you?
- What is your host OS?
- What is your guest OS?
- Why does it take longer to install an OS in Virtual PC?
- Why
should you wait to activate your
Lab 1-5 Installing Virtual Machine Additions and Other Tasks
Objectives:
P Install Additions into your operating
systems.
P Move between operating systems.
When you finish an
installation your OS will look like garbage. You need to install additions to
make it look and behave better under Virtual PC.
|
Task |
Shot |
Post
Installation Tasks and Virtual Machine Additions
Creating
an Administrator Account. A
new development when installing |
|
|
Each
|
|
|
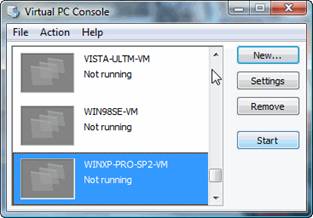
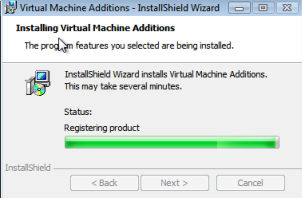
Virtual
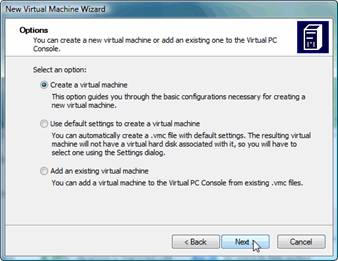
Machine Additions 23. Launch the Virtual PC Console. 24. Click the Action menu and select Install Virtual
Machine Additions. 25. Click Continue when the UAC comes up. |
|
|
Note: Not all machines will
support |
|
|
Check
and see if there are additions for Windows 98. If so, install them. |
|
Lab 1-6 Observing the Boot Process and Hardware Components
- Reboot either your lab computer, or one of your virtual machines. Carefully
watch your computer screen during the boot process (press Pause if
necessary), and record which CPU is used by your home or lab computer. If
you do not see anything, hit F2 to get into the BIOS and turn off “Quiet
Boot”. (You’ll have to search for it.)
- Who is the BIOS vendor and what version of the BIOS are you using?
- As the computer boots, memory is counted. Observe the memory count
and record the amount of memory detected. What number system is used to
count this memory?
- Open the printer icon in the Windows Control Panel and find out
which is the default Windows printer for your home or lab computer.
- Repeat this in your other operating systems. What
difference do you see?
|
Info |
DOS |
Win98 |
|
|
RAM |
|
|
|
|
Hard Drive |
|
|
|
|
BIOS Version |
|
|
|
Why do you see
differences?
- Look at the back (or the front if the ports are located there) of
your home or lab computer and make a drawing. Label on the drawing the
purpose of each port and connection you see. If you are not sure what the
purpose of the port is, label the port “unknown port.” In later chapters,
the purposes of these unknown ports will become clear.
Lab 1-7 Use Shareware
to Examine a Computer
Note: This exercise requires access
to the Internet.
Good PC support people are
always good investigators. The Internet offers a wealth of resources to those
who take the time to search, download, and investigate the possible uses of
software available there. This exercise is designed to help you learn to be
such an investigator.
Follow these directions to
download a shareware utility to diagnose Windows 2000, Windows 9x, or Windows
3.x problems and print a report from the downloaded software about the hardware
and software on your computer.
- Access the Internet and go to this address:
http://www.freshdevices.com/freshdiag.html
- Download the free version of Fresh Diagnose. (You can find it also
linked to our website.)
- Follow the steps on the screen to download the file diagnose.exe
to your PC.
- Run the program FreshDiagnose, and the
screen shown below appears.
- Play around with the different diagnostics and answer the questions
below.

- What is the model and speed of your
CPU?
- Which version of Windows are you
using?
- How much memory is installed on your
computer?
- What is your local IP address?
- What is the brand and model of your
display adapter?
1
You will use this program again
in later chapters, so don’t erase it!
Try running it in
Vista or Windows 7 and see what you get!
Lab 1-8 Using Microsoft Diagnostics and Device Manager with
Windows
Opening the computer case is
always a potential hazard. It is therefore important that you try to
troubleshoot any problems you can without opening up the case.
The device manager is the
tool to use for this purpose. It can tell you if an item is working, if there
are problems with it, or if it has been disabled. You can also disable it
(which can sometimes help in troubleshooting without you having to actually
remove the part from the computer), install a driver, or change resources.
Windows ME, 9x, 2000, and
XP and above contain a device manager. Windows NT and DOS do not.
You are going to do this
activity in Windows 7 and in Windows 98 so you can see the difference between
the two operating systems.
To access Device
Manager in Windows 9x, follow these steps:
- Click the Start button on the
taskbar, click Settings, and then click Control Panel.
- In the Control Panel window,
double-click the System icon.
- In the System Properties dialog box,
click the Device Manager tab.
Open device manager in each
operating system and answer the following questions.
- What is the brand of network card
installed in your system?
- What devices are listed under floppy
controllers?
- Describe another way to access the
device manager.
- What are the resources you can discover
in device manager?
- What devices are listed under CD ROM?
To get to Device Manager in
Windows 7
1. Right click on my computer,
select properties.
2. On the left under Tasks select
Device Manger. Select “Continue” when the UAC (User Access Control) pops up.
3. How is this different from W98?
4. Right click on My Computer and select
Manage. What things do you see?
5. Is the device manager here the
same or different from the one under properties?
6. Note: On tests you need to know
ALL ways to get to a program.
Disable a Device
- Boot into Windows 98.
- Go into your device manager and locate
your network card.
- Right click on the network card and
select disable.
- Restart your computer.
- Load Internet Explorer. What happens?
- Why?
- Go back into Device manager. What symbol is over the network card?
- Right click the network card and select
“enable”.
- Restart your computer.
- Load Internet Explorer. What happens?
- Why?
12.
What would be the purpose of
disabling a device on your computer? List at least three reasons.
Answer the following questions:
1.
Which Windows operating systems
do not include device manager?
2.
What systems will have the
device manager?
3.
How do you open device manager?
4.
What is the purpose of the
device manager?
1.
DOS and Windows offer the
Microsoft Diagnostics command. This utility examines your system, displaying
useful information about ports, devices, memory, and the like. (For Windows 9x,
search for the MSD.EXE utility on your Windows 9x installation CD and copy it
to your hard drive.) Boot your PC to a DOS prompt. From the DOS prompt, execute
this command:
C:\>MSD
- You should see a
screen similar to that in Figure 1-44. Browse carefully through all the
menu options of this interesting utility and answer the following questions
about your system:
- List
the following or print the appropriate MSD screen:
|
Manufacturer |
version number |
date of your System BIOS |
video BIOS |
mouse device driver |
|
|
|
|
|
|
- What
kind of video card is installed?
- Use
the information in Appendix D, “The Hexadecimal Number System and Memory
Addressing,” to answer these questions:
How
much memory is currently installed on this PC?
Look under TSR programs (terminate-and-stay-resident
programs, programs currently stored in memory but not running, will be covered
in a later chapter) for the MSD.exe program that you are executing.
What
is the hex address of the beginning of this program?
Convert the hex address to a decimal address.
What
version of DOS are you running?
What CPU are you using?
|
|
|
|
|
|
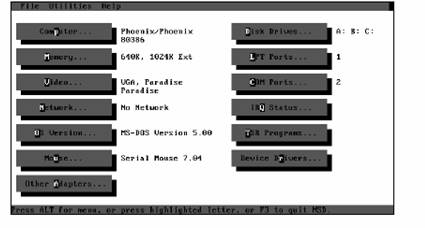
Sample Screen
When you
are finished, exit the MSD utility and return to the C prompt.
Lab 1-9 Using DOS!
Now that you have
DOS installed in your VM you’re going to practice with it! Click on your DOS
machine and click start. Do the stuff below!
Why DOS? Because
commands are used in a variety of applications in Windows, even though there is
a fancy schmancy GUI. There is an entire server OS
(ironically still called Windows) that runs via command line. The command
console in Windows Server 2003 and Longhorn is all command line.
So learning DOS commands will help you in a variety of applications.
Creating a Directory Tree
In Windows you create folders by selecting
newàfolder.
Pretty easy! In DOS we don’t call them folders, we call them directories. To
create a directory you use the command: MKDIR
(stands for Make Directory…pretty
clever, huh?)
Just like in Windows, you can embed
directories…that is create a directory within a
directory. A directory can contain other directories and files. A directory
that contains directories is called a directory tree.
You can organize directories according to
function, chronology, or subject. We’re going to create directories according
to subject.
- Right now you have one directory on your computer. It is your root directory, C:\>. To see the contents of this directory type dir. What do you see in your
directory?
- Does your data scroll off the screen? In order to see the contents
of your directory in a “wide” version, type DIR /W. Note that capital and small letters are
interchangeable. What does this command do?
Let’s
Create a directory tree:
- Type mkdir Chicken. What happens?
- Type DIR. What happens?
- You want to go into that directory, so type cd chicken. CD stands for change
directory. What do you see now?
- How can you tell you’re in the chicken?
- Create a directory named egg.
- Go into the egg.
- Create a directory named chick.
- Go into chick.
- To back out of a directory you type cd.. (cd period period). Type cd.. and
where are you now?
- Back out until you are at your root directory (c:\).
Now type the command tree. What
do you see? (Draw it)
- Type the dir command. What is the difference between the tree
command and the dir command?
- Go back into egg (all the
way in, but not all the way to chick) by using the cd
command.
- You’re going to create a text file using the edit command. Type edit scramble. A blue (probably)
screen will show up that looks like this:

- Type I love scrambled eggs.
- Since you don’t have a mouse (yet) in DOS, you’re going to have to
use your keyboard. The alt key allows you to select a menu by holding down
alt-and typing the highlighted letter in the menu (example alt-f opens the
file menu as shown below)
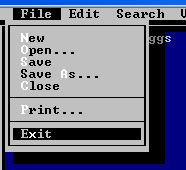
- Type alt f x to exit.
Say yes you want to save changes. This is one way to create a document.
The edit command opens the text editor, by typing edit scrambled you
either:
- Open up a new document that has the name scrambled, or
- Open up an existing document named scrambled.
- Type edit and hit enter.
You now have a blank document. Type I
like poached eggs too. Hit alt
f x and this time it will ask you if you want to save and ask you to
give it a name. Name it poached.
- Type dir and what do you
see?
- Go back to the root directory. Type tree. Do you see the files you created? Why or why not?
Renaming a file
- To rename a file, type REN nameoffile newname.
- Go into your root directory and create a
directory named fun.
- Go into fun and create a text file named
games.
- Within fun type ren
games toys
- What happens? Do a DIR.
Renaming (moving) a directory
- Type CD \ and press Enter (“\” in DOS represents the
root directory).
- Create a directory named Student.
- To rename the Student directory to Student2, type MOVE
C:\STUDENT C:\STUDENT2 and press Enter.
- To observe the results, type DIR and press Enter.
Moving files
- Go to your root directory and create a file named test.txt by
typing edit test.txt. Type
something in, exit, save.
- Back in C:\ type move
c:\test.txt c:\student2\
- To observe the results, type DIR and press Enter.
What do you see?
- Go back to your root. You can also move and rename a file at the
same time! Create a new file named test2.txt in your root.
- Type move c:\test2.txt
c:\student2\test3.txt. Do a DIR. What do you see?
Okay, I know you’re asking yourself, why are
we using DOS? Why? DOS is deader than dead! Well there are a few reasons:
- You will be using a command driven interface when working with
routers and switches in CISCO. Getting used to it by using DOS helps you
to understand the importance of syntax, spelling, etc.
- In Windows Servers if you’re server dies and you can’t afford to simply
reformat it, you can use the command prompt and the CD to resurrect it. It
uses a minimal set of DOS commands.
- Many jobs you do within Windows 2003 server can be done from the
command prompt or a wizard. Why use the command prompt when you have a
wizard? It’s faster and you can’t create batch files that use a wizard.
(Well, you can but not as easily.)
- You can create DOS driven scripts (batch files) that can be
replicated across your network for doing simple jobs on the network.
Now back to your regularly scheduled
programming.
Viewing and changing file attributes
- To change to the Student2 directory, type CD STUDENT2 and
press Enter.
- To view the attributes of the test2.txt, type ATTRIB
C:\STUDENT2\TEST2.TXT and press Enter.
- To make the file a hidden file, type ATTRIB +H C:\STUDENT2\TEST2.TXT and press Enter.
- To observe the results, type DIR and press Enter.
- To remove the hidden attribute from the file, type ATTRIB -H
C:\STUDENT2\TEST2.TXT and press Enter.
Putting it all Together!
You are going to take all the stuff you
learned above and create a directory, look at the tree, create files and
directories, rename them and move them on the test so let’s practice!
- Go to your root.
- Create a folder named Herd
- Go into Herd and create a subdirectory named cow.
- Create another subdirectory (in herd) named bull.
- Go into cow and create a text file named milk.
- Back out to your root directory.
- Do the tree command. Draw what you see.
- NOW…you’re going to rename the bull directory to steer (poor bull,
but he’s nicer now and much happier…trust me). Write the command you used
to do this below:
- NOW…you’re going to move the milk file from the cow into the steer
and rename it cud all at the same time. Wipe your brow…take a deep
breath…get ready…you can do it! You can do it! GO! Write the command you
used to do this below:
Review Questions
Circle True or False.
- The TREE command is not always available in recent versions
of DOS. True /False
- When you receive the error message “Bad or missing command.com,” it
means that the entire operating system is corrupt and must be reinstalled.
True / False
- What does the CD command stand for?
- What is the ATTRIB command used for?
- Name one required DOS system file.
- Patrick, one of your customers, is trying to find a file located in
the MyData directory on his computer. What
command would you suggest that Patrick use to view the contents of the MyData directory?
- John has attempted to rename a directory using the following
command: REN C:\MYDATA C:\MYSTUFF
Explain why this command might not work, and recommend a different command
for John to use.
Unit
Project
Your
company has been hired to build 30 computers for Public School Number Nine.
Your job is to:
- Determine the needs of your
customer.
- Current
needs
- Future
needs
- Design a student system that
will fulfill the needs of students.
- Design a teacher system that
will meet the needs of the teachers.
- Price out the components of
each system.
- Give a proposal bid for 28
student stations and 2 teacher stations as well as any additional
components/peripherals needed. Be sure to include:
- All
components on each system
i.
Case
ii. Motherboard
iii. Processor
iv. Fans
v. RAM
vi. Hard drive
vii. CD ROM drive
viii. Mouse
ix. Keyboard
x. CRT
- Additional
hardware needed
- Software
needed
i.
Operating system
ii. Applications
Task One: Create a
list of words that must be defined in order for the customer to understand the
proposal (jargon)
Task Two: Develop
a list of questions that must be answered before you can begin fulfilling the
customer order. When you have developed this list, show it to me and in
exchange I will give you the information from the customer.
Task Three: Develop
a list of current customer needs.
Task Four: Develop
a list of future customer needs.
Task Five: Research components and start “building” the
system.
Task Six: Print or draw a picture
of the systems you have created.
Student
System
|
Device |
Price |
Company |
Website |
|
Case |
|
|
|
|
Power Supply |
|
|
|
|
CPU speed |
|
|
|
|
Motherboard |
|
|
|
|
Processor type |
|
|
|
|
Installed RAM |
|
|
|
|
RAM speed and type |
|
|
|
|
Sound card |
|
|
|
|
Video card |
|
|
|
|
Hard Drive |
|
|
|
|
CD ROM |
|
|
|
|
DVD RW |
|
|
|
|
Mouse |
|
|
|
|
Keyboard |
|
|
|
|
Modem or network card |
|
|
|
|
Slots on motherboard |
|
|
|
|
Power supply |
|
|
|
|
Floppy drive |
|
|
|
|
Operating system installed |
|
|
|
|
Installed software packages |
|
|
|
|
|
|
|
|
|
|
|
|
|
|
|
|
|
|
|
Other Hardware Needed |
|
|
|
|
|
|
|
|
|
|
|
|
|
|
|
|
|
|
|
|
|
|
|
Teacher
System
|
Device |
Price |
Company |
Website |
|
Case |
|
|
|
|
Power Supply |
|
|
|
|
CPU speed |
|
|
|
|
Motherboard |
|
|
|
|
Processor type |
|
|
|
|
Installed RAM |
|
|
|
|
RAM speed and type |
|
|
|
|
Sound card |
|
|
|
|
Video card |
|
|
|
|
Hard Drive |
|
|
|
|
CD ROM |
|
|
|
|
DVD RW |
|
|
|
|
Mouse |
|
|
|
|
Keyboard |
|
|
|
|
Modem or network card |
|
|
|
|
Slots on motherboard |
|
|
|
|
Power supply |
|
|
|
|
Floppy drive |
|
|
|
|
Operating system installed |
|
|
|
|
Installed software packages |
|
|
|
|
|
|
|
|
|
|
|
|
|
|
|
|
|
|
|
Other Hardware Needed |
|
|
|
|
|
|
|
|
|
|
|
|
|
|
|
|
|
|
|
|
|
|
|
1.
What is the price difference
between the two machines?
2.
Why is the one cheaper than the
other?
3.
How does the student station
meet the needs of the students?
4.
What are some benefits of
buying a pre-assembled system?
5.
What are some benefits of
building a system yourself?
Task Six: Put
together a proposal to the company (follow the cover sheet). You may use Word,
PowerPoint, or Publisher. Your proposal should include:
Customer
Overview
Identify
Customer Needs
Identify
Possible Solutions
Define
terminology used (jargon, technical terms)
Price Out
Solutions
Diagram of
Solutions (what will the computers look like when they’re done)